With a name like Screaming Toe Pose, it’s easy to assume this one isn’t going to be your favorite. But funny enough, the poses we resist the most are often the ones our bodies need the most. This one’s a great addition to your warm-up routine in yoga. It’s super easy to get into, but staying there? Not so much. You can work your way up over time, and the longer you can hold it, the more you’ll get out of it. It’s a fantastic posture to stretch and open up your ankles, toes, and feet—areas we often overlook in yoga.
Sure, we spend a lot of time stretching our hips, shoulders, hamstrings, and chest. But what about your feet, toes, and ankles? That’s where Screaming Toe Pose comes in.
Why Practice Screaming Toe Pose?
We don’t often dedicate time to stretching out the lower parts of our body like the toes and ankles. But the benefits? Totally worth it. Here’s what this intense little pose can do for you:
- A Deep, Immediate Stretch: Honestly, one of the strongest stretches I’ve ever felt in a yoga class came from this pose. You’ll feel it right away in your ankles, toes, and feet.
- Tension Release: Most of us don’t even realize how much tension we hold in our feet and ankles. This pose helps release all of that and stimulates reflexology points in the feet, leading to a deeper sense of relief.
- Builds Strength: If you feel a bit wobbly standing on one foot, this pose can help. It not only stretches your toes and ankles but also strengthens them.
How to Warm Up for Screaming Toe Pose
Screaming Toe Pose is usually practiced at the start of a yoga session to warm up for deeper stretches. You can prep your body with a few exercises beforehand:
- Foot Massage: Use your hands to gently massage your toes, ankles, and the soles of your feet before getting into the pose.
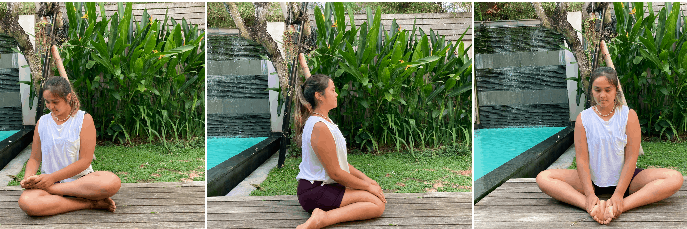
- Hero’s Pose (Virasana): A strong stretch for your ankles, knees, and the tops of your feet. Kneel with knees together, lift your sit bones, and slide your heels apart with toes pointing back. Sit between your heels. If your hips don’t easily reach the mat, use a block or two for support and hold for five breaths.
- Cobbler’s Pose (Baddha Konasana): Sit with your feet together, knees out to the sides forming a diamond shape. This opens up your hips, ankles, and feet. You can place blocks under your knees for support. Hold for five breaths to build mobility in your ankles and Achilles.
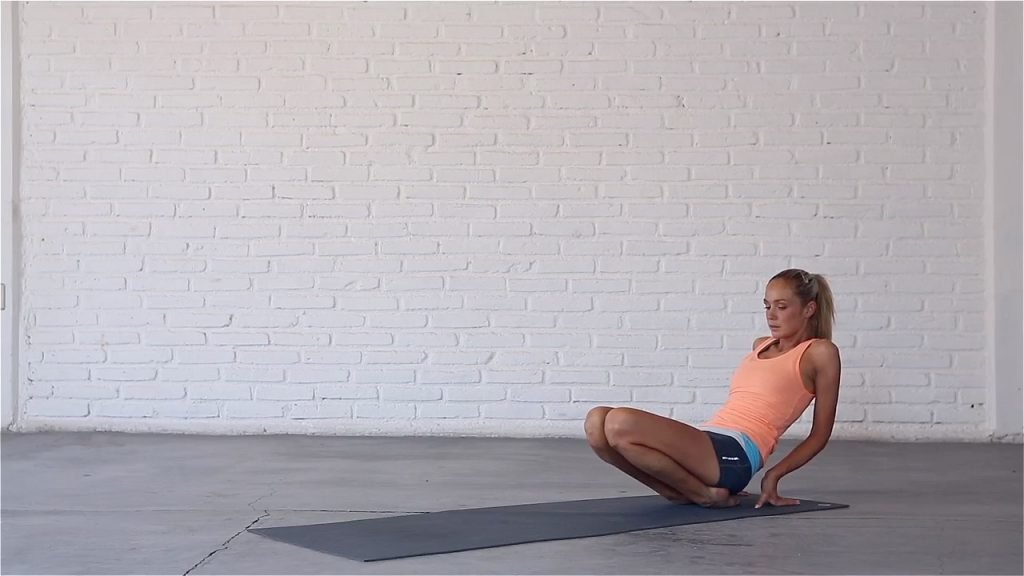
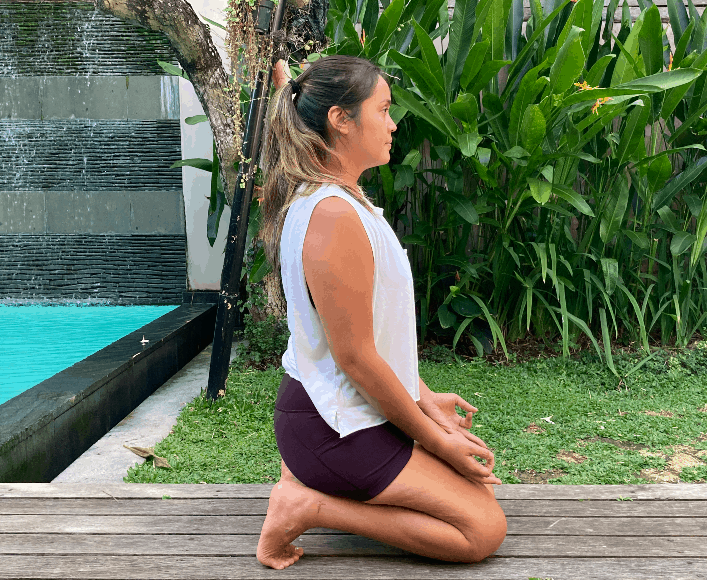
How to Do Screaming Toe Pose
There’s a reason it’s called Screaming Toe Pose—take your time getting into and out of it. Be very mindful of your breath and move slowly. Let your breath help guide you into the stretch.
Here’s how to practice it:
- Start on your hands and knees. Make sure your hands are under your shoulders and knees under your hips.
- Walk your hands back toward your knees and lift your hands off the mat, resting them on your lap.
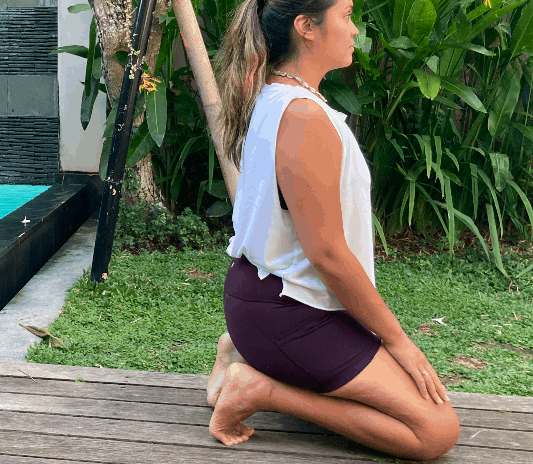
- Sit upright on your knees with a tall spine.
- Tuck all 10 toes under and make sure your heels are pointing straight up.
- Slowly sit back onto your heels.
- Place your hands on your knees, keep your spine long, shoulders relaxed, and chest open.
- Stay for five deep breaths. Close your eyes and focus on slow, steady breathing.
- As you get more comfortable, increase how long you stay in the pose.
- To come out, place your hands back on the mat, untuck your toes, and gently move your feet, ankles, and toes to release any tension.
Common Mistakes to Avoid
Screaming Toe Pose is intense, and correct alignment is key to avoid injury. Here are a few common mistakes to watch out for:
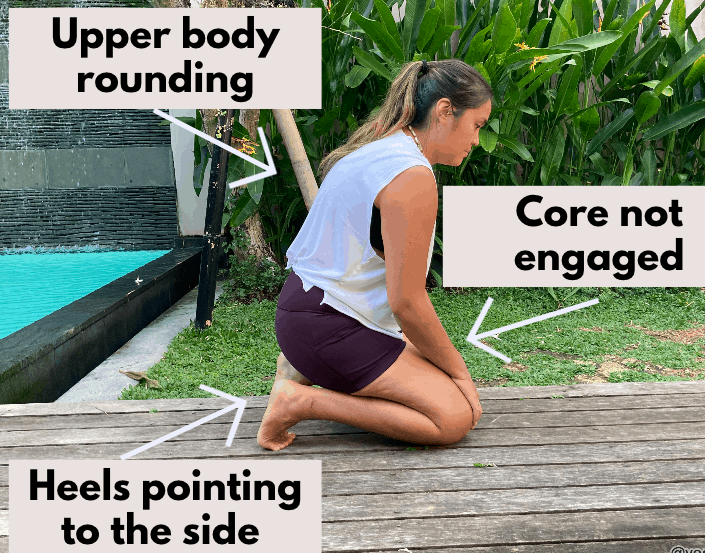
- Heels Not Aligned: Your heels should point directly up. If they fall to the sides, you risk tweaking your knees, ankles, or toes.
- Rounded Back: Keep your spine long. Rounding your back causes your chest to collapse. You want your torso to stay open and spacious.
- Disengaged Core: Support yourself by gently pulling your belly button toward your spine. A strong core makes the pose more stable and reduces discomfort.
Modifying the Pose
If you’re new to this posture, it can definitely feel overwhelming—but don’t skip it! The poses we struggle with are usually the ones we benefit from the most.
Try these modifications:
- Use Props: Place a folded blanket or cushion under your knees if they’re sensitive. You can also put a blanket over your heels if sitting directly on them feels too intense.
- Shorten the Duration: Can only manage one or two breaths? That’s totally fine. You can build up slowly. The key is to go at your own pace and be patient.
Beginner Tips
- Breathe into the resistance instead of fighting it.
- Let go of any tension in your face, shoulders, or jaw.
- Focus fully on your breath—inhales and exhales.
- Don’t force it. If it gets too intense, ease out a little and build back up.
- As you become more flexible, you can increase intensity by sitting lower or curling your toes more deeply.
Variations to Try
Want to change things up a bit? Here are a couple of variations to explore:
- Add a Mudra: While your hands usually rest on your lap (palms up or down), you can try using a hand mudra to enhance your practice.
- Turn Up the Intensity: Shift your knees slightly forward or curl your toes under even more. You’ll feel the stretch deepen instantly!
When to Skip This Pose
This pose can feel intense even if you’re perfectly healthy. If you have any injuries in your feet, knees, or ankles, it’s best to skip it—or at least modify it—to avoid making things worse.
That said, once you come out of the pose, your feet and ankles might feel amazing—alive, open, and full of energy. Make sure to finish with a gentle stretch. Spread your toes wide on the mat and give them a good wiggle. After a pose like this, even that little movement will feel incredible!
Leave a Reply